RAMADDA recognizes any plugin file that ends with types.xml as an entry type definition file.
Here is an
exampletypes.xml file and
there are numerous examples in the source code @ github,
e.g.
https://github.com/geodesystems/ramadda/tree/master/src/org/ramadda/geodata/point/resources
You can use the above xml file as a plugin, copying it into your RAMADDA home/plugins directory.
But, if you wanted to include html or other resources you should create a directory
structure like below and zip the directory and copy the .zip file to the plugins directory.
someplugin
      exampletypes.xml
      htdocs
          myplugin
               example.png
For example, this would allow you to reference the example.png image as an icon for the entry type with
the property:
<property name="icon" value="/myplugin/example.png"/>>
Each entry can have any number of column attributes. Each column (see in the example above) has a name, label, type, etc:
- string - Use size="..." to specify the column size
- enumeration - See below to specify values
- enumerationplus - Just like enumeration but allows use to enter new text values
- list - A big string internally but shows a list of newline separated text values to the user
- password - A string but is shown in a password field
- clob - A big character large object
- int - Integer
- double - floating point number
- percentage - floating point number shows as percentage
- boolean
- date - Just a date
- datetime - A date and a time
- email - Shows as an email address
- url - Shows as a URL
- latlonbbox - spatial bounds
- latlon - A single point
For enumeration or enumerationplus types you can specify a set of enumeration values.
<column name="fruit" label="Fruit" type="enumeration" values="apple,banana,orange" cansearch="true" />
An entry type can have a wiki tag that defines the wiki text template for the entry.
The example file above has an example of this wiki text, e.g.:
<wiki>
<![CDATA[
+section title={{name}}
:navtop
{{description wikify=true}}
:heading Charts
{{group}}
{{display type=linechart showMenu=true fields=discharge}}
{{display type=linechart showMenu=true fields=gauge_height}}
:vspace 0.5em
:heading Table
{{display_download}}
{{display_table}}
:vspace 1em
----
:heading Information
+row
+col-md-6
{{information  details="true"  showTitle="false"  }}
-col
+col-6
{{map}}
-col
-row
-section
]]>
</wiki>
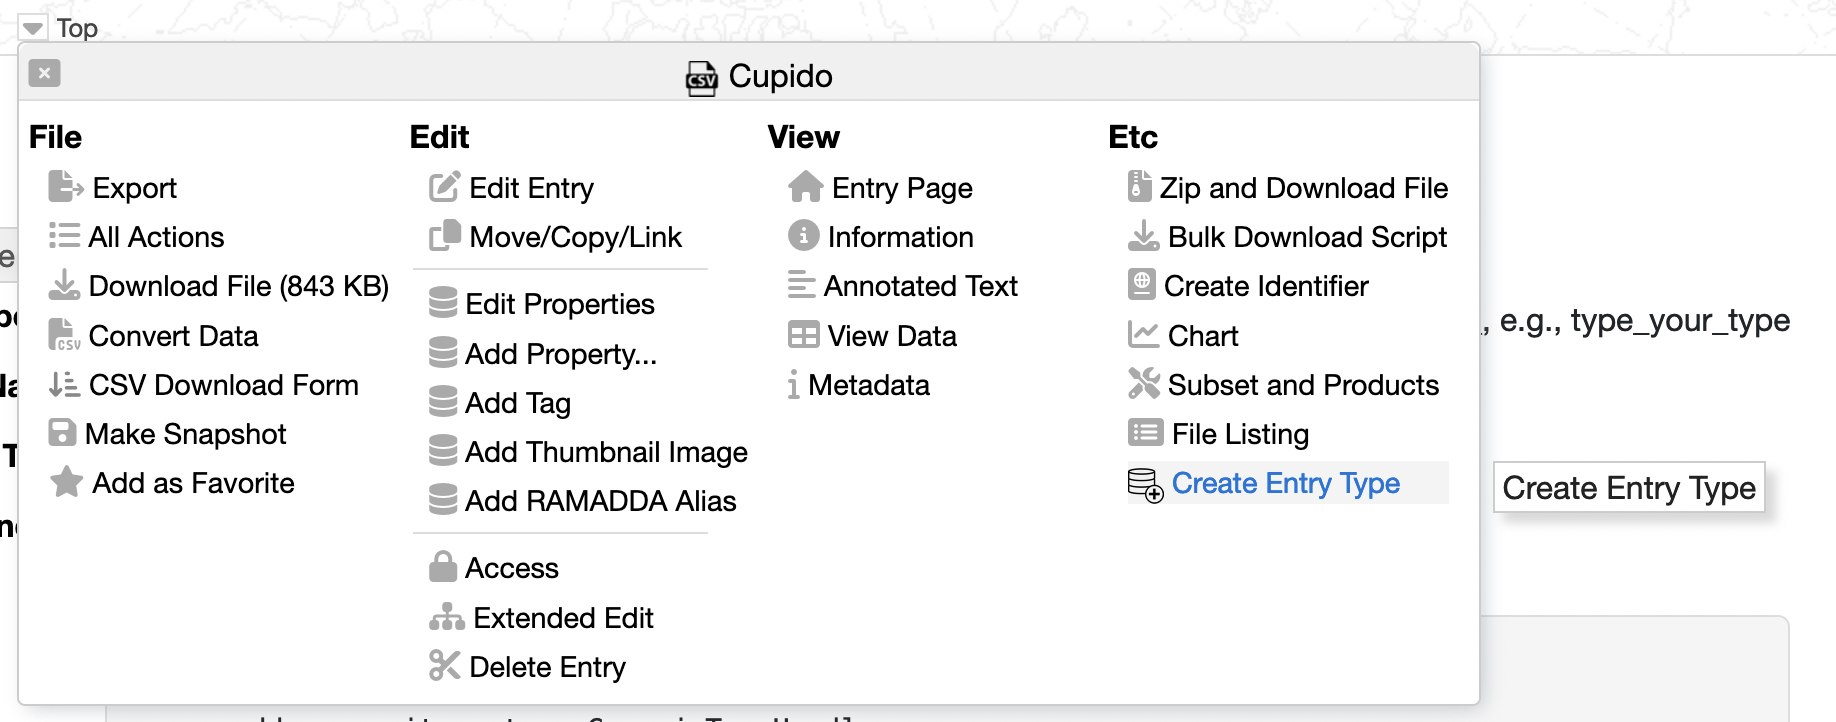
All entries have a Create Entry Type form available. From the Entry popup menu
select "Create Entry Type"
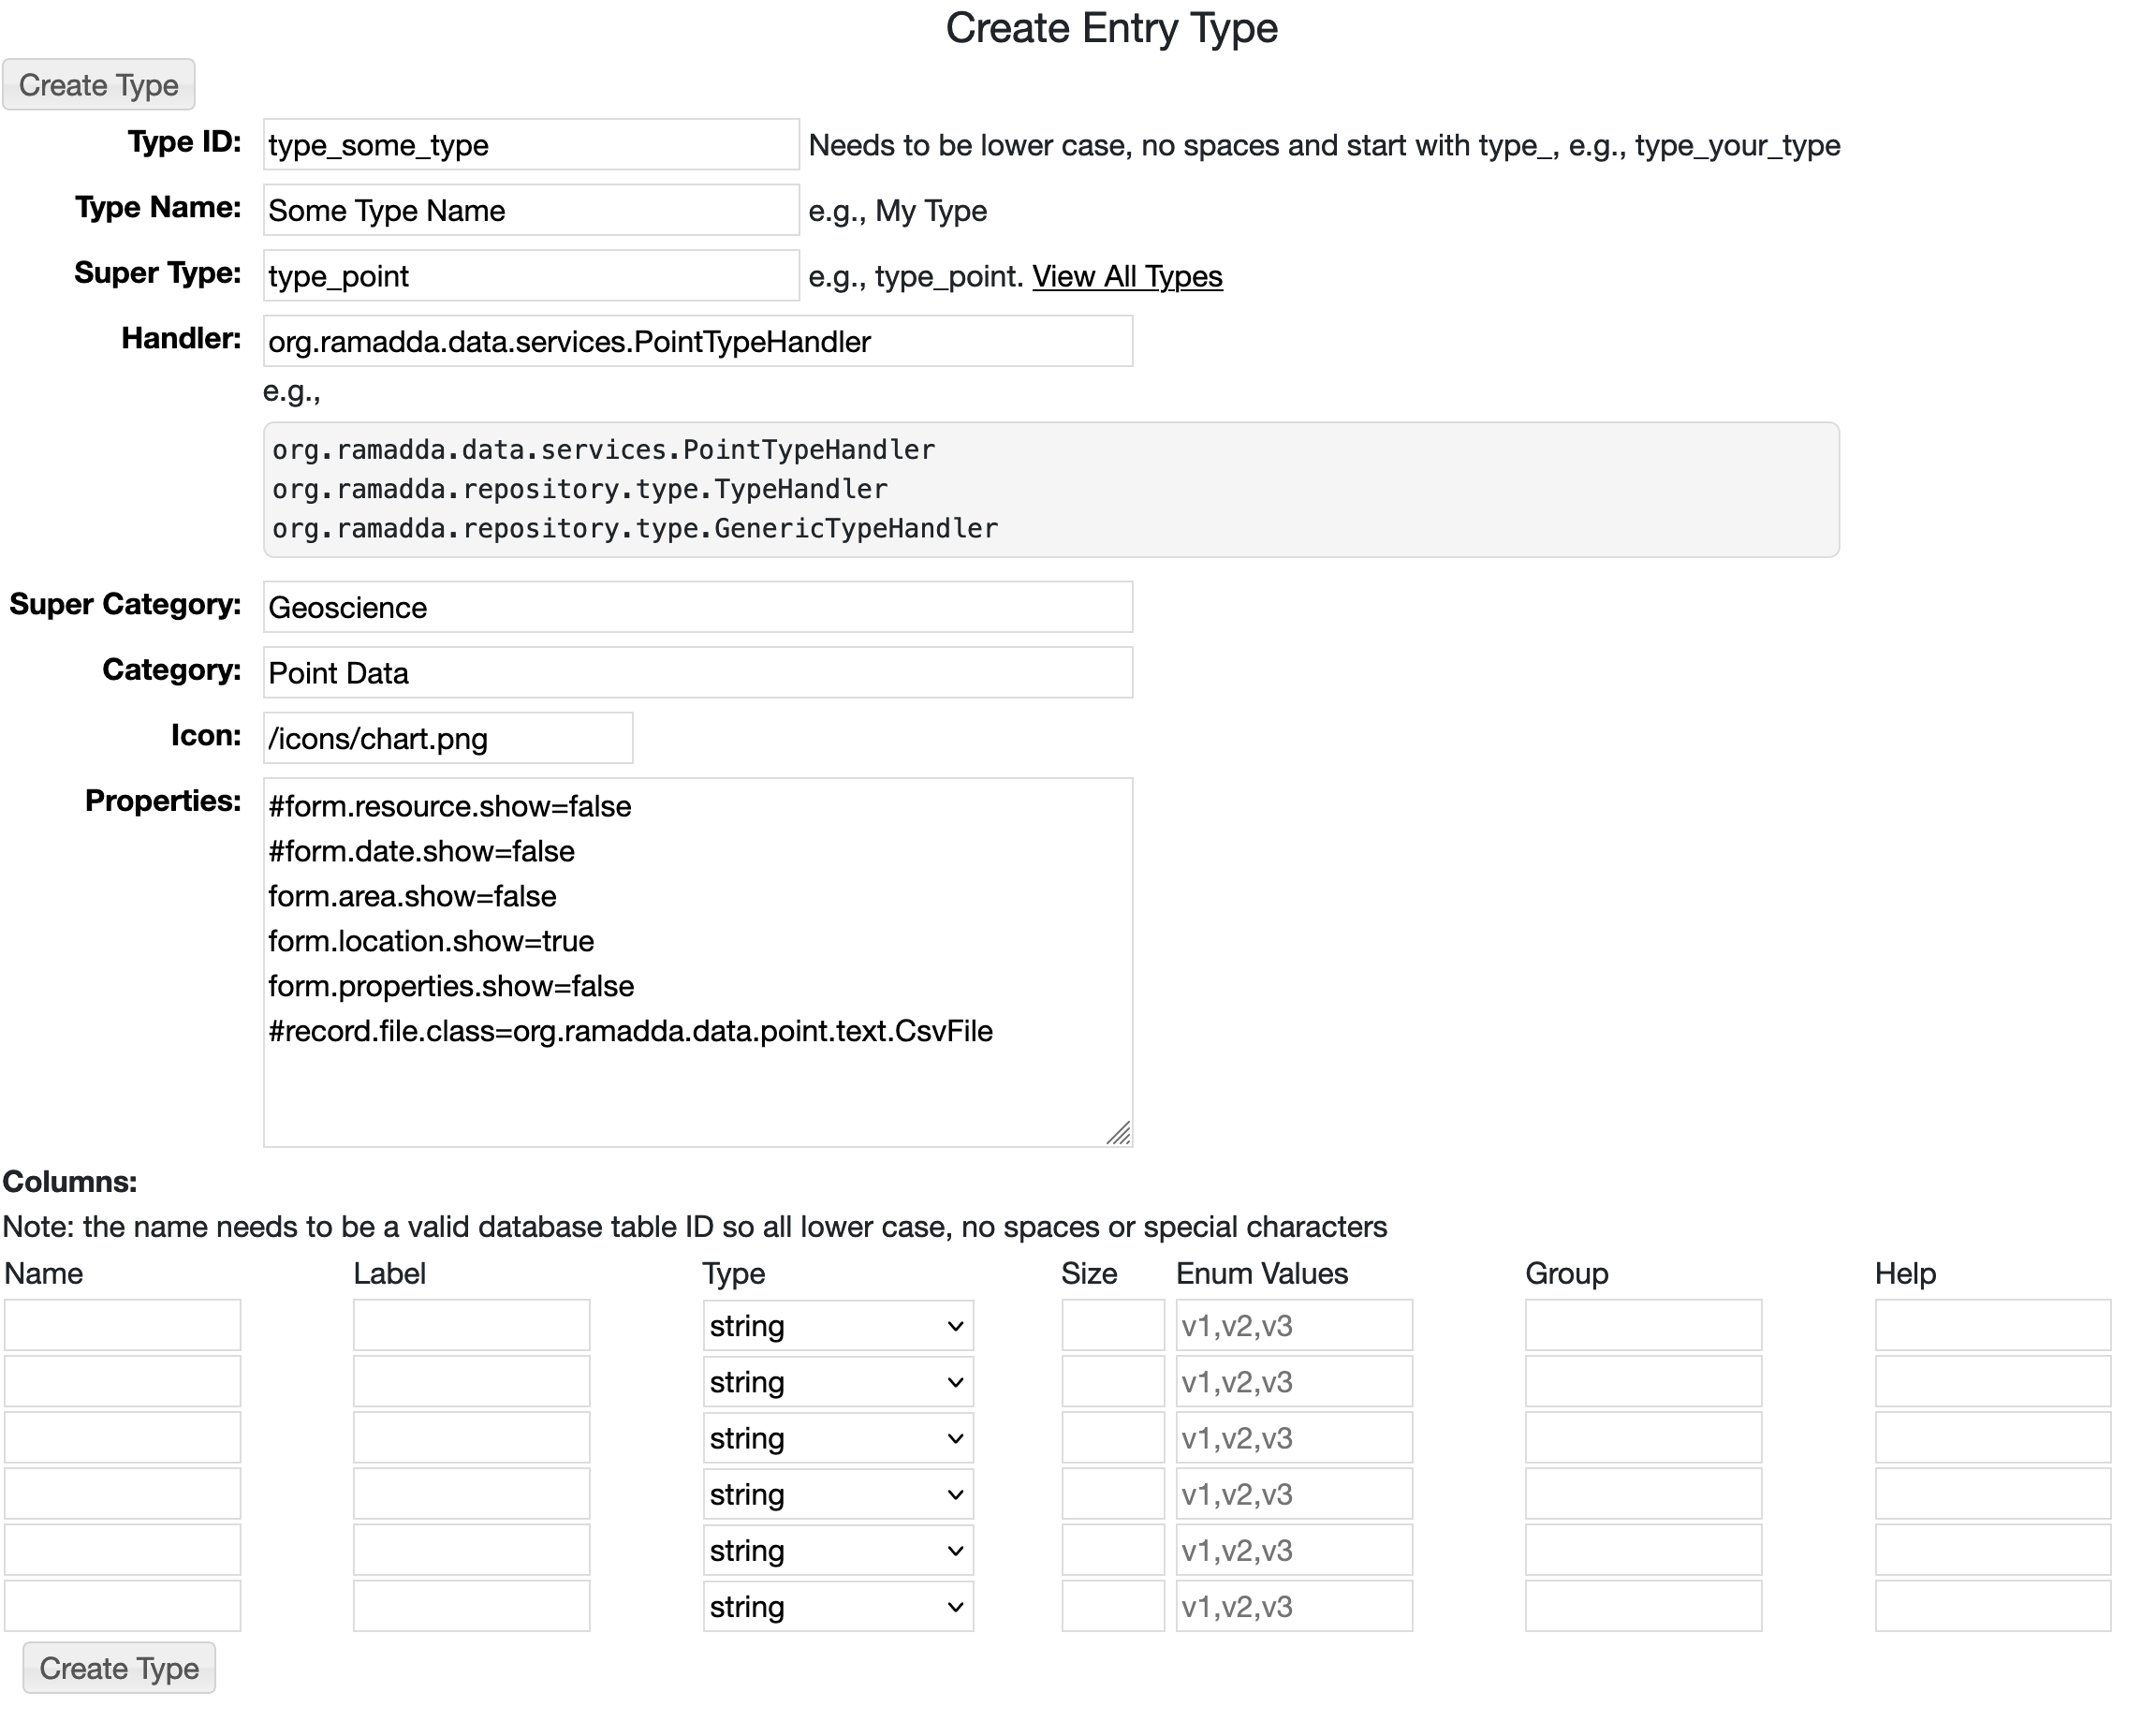
Will give the below form (with examples filled in).
For example, let's say you have 100 CSV files of the same format and want to create a new entry type.
Upload one of the CSV files to your RAMADDA. You can use the
SeeSV package
to data wrangle the CSV file, cleaning up the data, adding a header, etc. You can then edit the description
of the CSV file and enter the appropriate
wiki text to define the entry type's appearance.
Once satisfied, go to the Create Entry Type form and specify:
- A type ID - this needs to start with type_, be lower case with no spaces or special characters
- A name of the type
- A "super type" - entry types in RAMADDA are hierarchical. If you want this to be point data the specify type_point. There is a link to the master list of all entry types available.
- A handler - this is the Java class that handles this type. If this is point data then specify "org.ramadda.data.services.PointTypeHandler". If it is just some normal entry but you will specify metadata columns then specify "org.ramadda.repository.type.GenericTypeHandler". Else specify "org.ramadda.repository.type.TypeHandler"
- You can specify an optional Super Category and Category. This is used to organize the big list of types.
- An icon. You can provide your own icon as described above or view the icons available on github
- Properties - these are flags to control what is shown, e.g., area, date, etc. Note: If this is point data based on a CSV file then make sure you include the record.file.class=org.ramadda.data.point.text.CsvFile
- Columns - these are the columns as described above. For example, you can specify a "fruit" column whose tpye is enumeration and values are "Apple,Orange,Banana"
Once specified press Create Type. This will generate and download a types.xml file which you can install as a plugin. If you have any SeeSV commands specified for the entry then those are included in the generated
types.xml. If you have wiki text specified then that too is included.
| The form settings are not saved on the RAMADDA server. Rather, they will be saved in your browsers local
data storage keyed on the specific entry ID your are viewing. So, when you return to this form the past fields
should be filled out.
|